Click the button for an introduction to following a GPX route on a walking app, and some of the most popular apps available.
Click this button to view all the GPX files available on this website to follow a Monsal Trail walk.
Happy to help…
For help and advice on installing and using GPX files, simply get in touch using the contact page.
Using OutdooorActive
GPX files for all the routes featured on the website are now available for just £1.50 each. Simply click the GPX link on any walk description to purchase and download. You can then follow the walk in real time, without having to continually refer to printed directions – either in a book or a website – which can often be confusing.
There are a few popular waking apps, all of which do very much the same thing. And most have free versions which will do everything you need to install and follow a GPX route. I use OutdoorActive, but other people swear by OS Maps, Kamoot or AllTrails.
Synchronising the route
This is a simple step-by-step guide on how to install a GPX file on a smartphone using OutdoorActive. Personally, I prefer uploading a GPX on a desktop browser as I find it easier to work on a keyboard and larger screen, but the sequence is the same. The route can then be synchronised to your phone.
Click here for OutdoorActive’s own guide to using their app.
Click here to view all the Monsal Trails GPX files available here for download.
Click here for an explanation of GPX and to compare free and paid-for versions of other walking apps.
Paid for versions
At the time of writing (September 2025), the paid-for ‘Pro’ version of OutdoorActive costs £26.99pa. A couple of major benefits are the ability to download a route – which helps if you can’t get a mobile signal. And access to detailed Ordnance Survey maps. But my advice would always be to try the free version first.
1. Search your App Store for OutdoorActive and install.

2. Open the app and sign up using your email address and a password. Enter your name and agree to the terms and conditions.

3. OA will send an email to the address used to register. Simply click on the link to confirm it’s you.

4. The next screen offers a 7-day free trial for the paid-for ‘Pro’ version of OA (see above for benefits). To continue with the free version, simply close this window by clicking the X at top right.

5. You should now see your home ‘My Page’ screen which will list all your saved routes, plans and tracks. Routes are the final record of a walk. Plans are a draft version of a route. And Tracks are a recording taken during a walk.
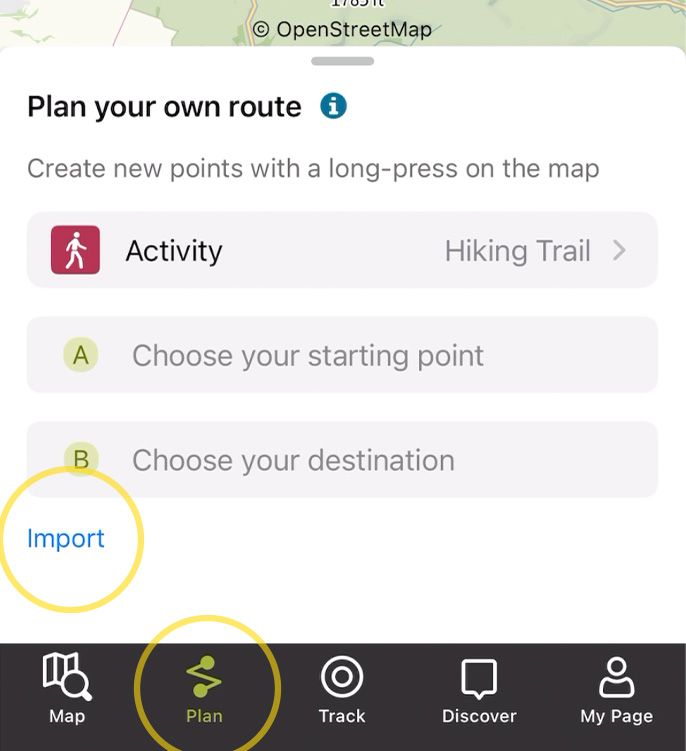
6. To upload a GPX file, click the ‘Plan’ symbol and then ‘Import’. You can then navigate to the file, which will normally be saved to your ‘Files’ or ‘Downloads’ folder. Click the GPX file and it should open it as a plan.
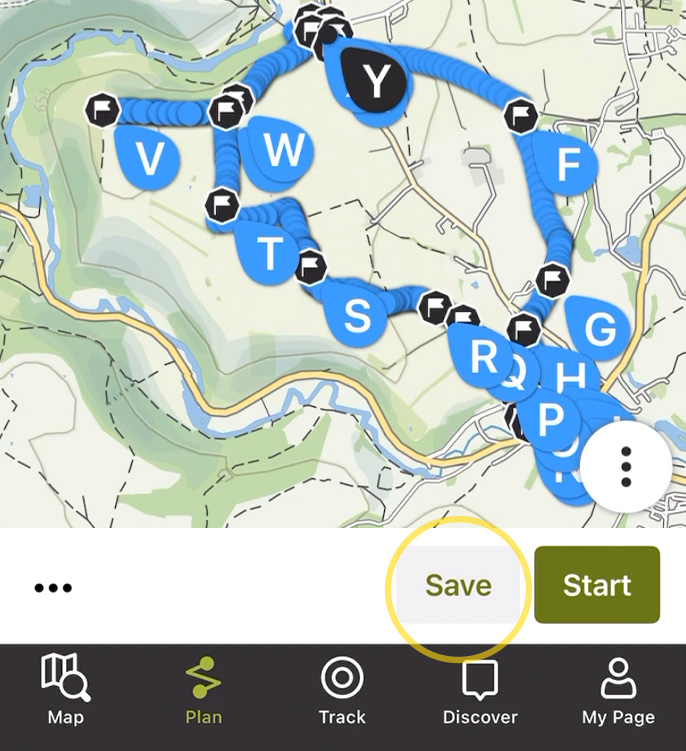
7. Click ‘Save’ to check and then save the plan. It will now appear under ‘My Page’ in the ‘Plans’ list. You can then make it a ‘Route’, but this isn’t necessary.
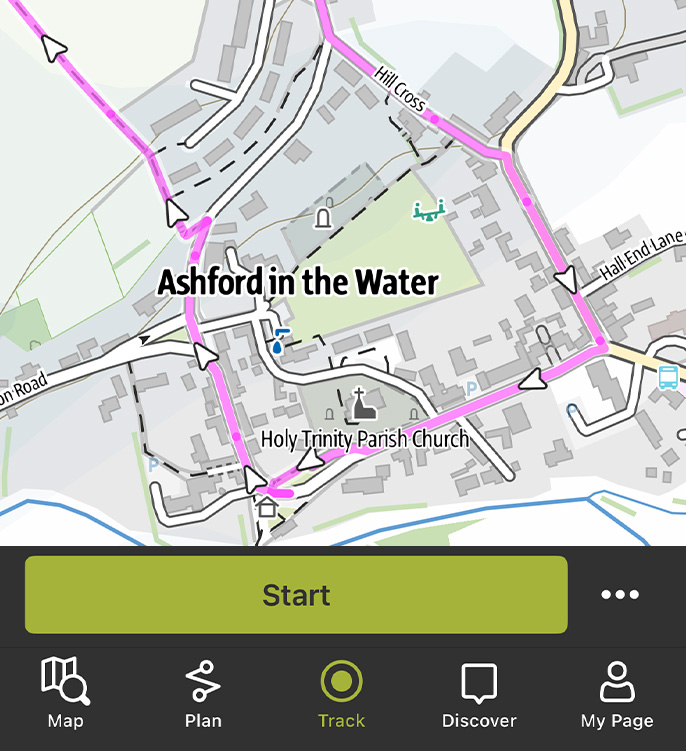
8. Open the plan and click ‘Start’. You can then zoom in to view the route in more detail. Clicking the arrow at bottom left of the screen will highlight exactly where you are. And ‘Plan your journey’ will get you to the start point using either Google or Apple Maps.
